Interactive Query UI Tutorial
The Interactive Query UI can be accessed via browser from https://annoq.org/search
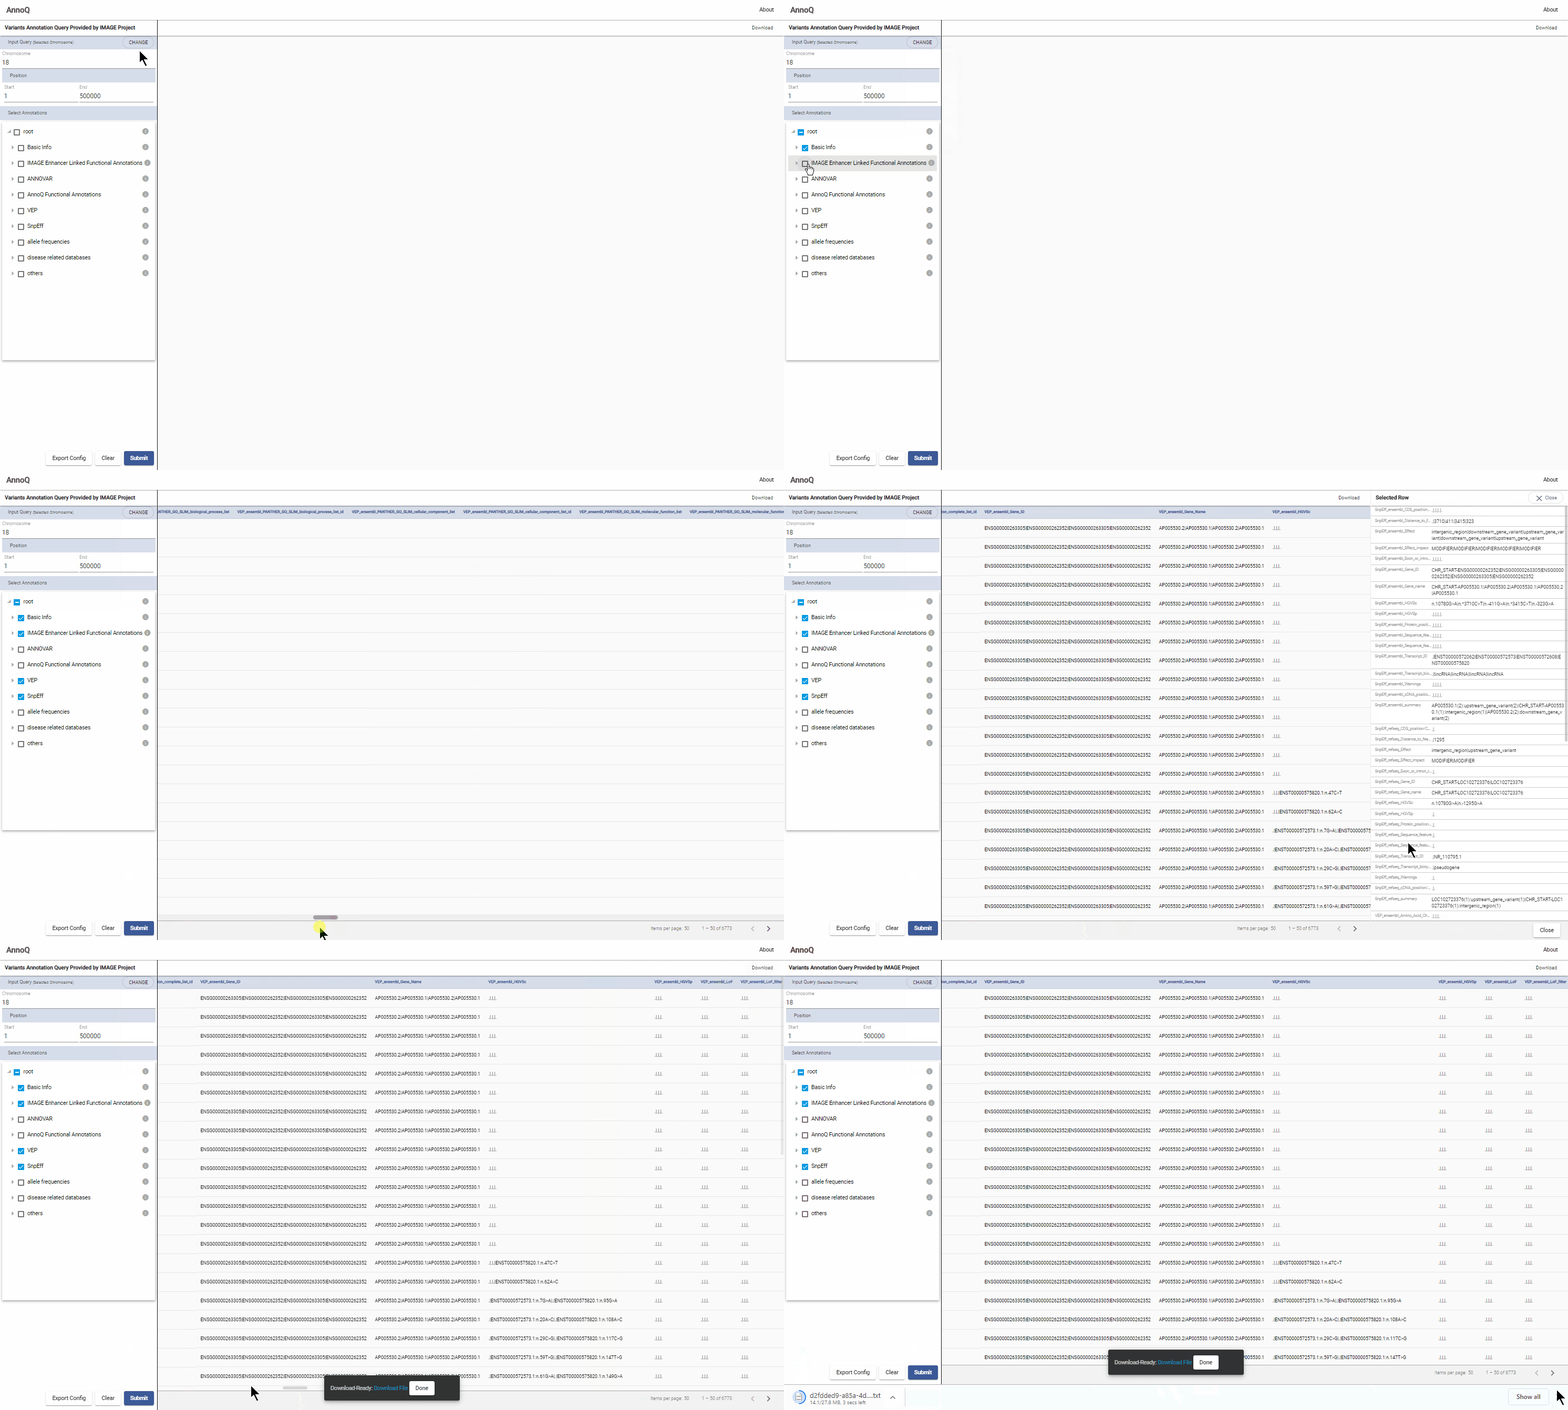
It is composed of 3 main panels, the Query Panel, Result Panel and Result Summary Panel
1 Queries (Query Panel)
The Query Panel allows a user to choose a query type (1.1) and select annotations (1.2).
1.1 Input Query
Select a query type and input the query term. There are 5 types of supported queries as described below (1.1.1 - 1.1.5). Click the “Change” button to choose a query from the dropdown menu.
1.1.1 Genome Coordinates Query
Select “Chromosome” from the dropdown menu to query by chromosome location. Specify the chromosome number, start and end positions.
1.1.2 Query by Uploading VCF file (Variants List)
Select “VCF File” from the dropdown menu. Upload a VCF file of up to 10,000 variants by clicking the “Populate from a File” button and select a VCF file from your file system.
1.1.3 Gene Product Query
Select “Gene Product” from the dropdown menu. Input a gene or protein ID (e.g., ZMYND11). All variants located in the gene region will be returned. Currently, the system can only query one gene at a time. The tools supports the following ID types: -Ensembl: Ensembl gene identifier. Example: “ENSG00000126243” -Ensembl_PRO: Ensembl protein identifier. Example: “ENSP00000337383” -Ensembl_TRS: Ensembl transcript identifier. “Example: ENST00000391828” -Gene ID: EntrezGene IDs. examples include, “GeneID:10203”, “10203” (for Entrez gene GeneID:10203) -Gene symbol: for example, “CALCA” -GI: NCBI GI numbers. Example: “16033597” -HGNC: HUGO Gene Nomenclature ids. Example: “HGNC:16673” -IPI: International Protein Index ids. Example: “IPI00740702” -UniGene: NCBI UniGene ids. Examples: “Hs.654587”, “At.36040” -UniProtKB:UniProt accession. Example: “O80536” -UniProtKB-ID: UniProt ID. Example: “AGAP3_HUMAN”
1.1.4 rsID query
Select “rsID” from the dropdown menu. Enter an rsId in the text box.
1.1.5 rsID list
Select “rsID list” from the dropdown menu. Enter multiple rsIDs separated by newline
1.2 Select annotations
The annotations are organized in a tree structure of categories and its individual annotations.
Select the entire category by clicking on the checkbox (such as ANNOVAR).
To choose individual annotations in a category, expand the tree by clicking the triangle next to the checkbox and click the desired checkboxes. Annotations can also be selected by clicking on the Upload Config button and selecting a configuration file with annotations of interest. See section 1.4 on how to Export selected annotations for future searches or for sharing with colloborators.
1.3 Submit query
Submit query by clicking the “Submit” button in the bottom of the panel. The results will be displayed on the result panel of the page. If more than 50 SNPs are returned, the arrows below the table can be used to navigate through the results.
1.4 Export configuration file
There are many annotation types stored in the system. Users may only want to focus on a subset. Through the process above, users can view the results and determine the annotations to use. The user selected annotation list can be saved in a configuration file. The configuration file can be used for subsequent searches, shared with colloborators or used with the API or software packages. To save the selected annotation types, click on the Export Config button.
2. Query Results (Results Panel)
The results are represented in a table format with one row for each variant. The first 5 columns contain the basic information of the variant: chromosome number, position, reference base, alternative allele, and rsID if available. The remaining columns are annotations corresponding to the selection made in 1.2.
To select an individual row for detailed result, click the row and the summary panel will appear
2.1 Download results
The results displayed on the results panel can be downloaded. To do so, click the “Download” button on the right upper corner of the results panel. The downloaded file is generated on the server. A link will be displayed. The user can click the link to download the file.
It may take some time to generate the file for downloading.
3. Summary Panel
Click a row to see the summery page of the variant.
Query UI in 20 seconds
